> ## Documentation Index
> Fetch the complete documentation index at: https://getkoala.com/docs/llms.txt
> Use this file to discover all available pages before exploring further.
# Google Tag Manager
While Koala can be added to your website with Google Tag Manager (GTM), you
may want to directly [embed the JavaScript snippet](/docs/get-started/quick-start)
because GTM is commonly disabled by ad blockers.
Google Tag Manager (GTM) is a simple solution for managing tags and JavaScript
snippets that send data to third parties (like Koala) from your website or app.
You can easily add, remove and manage snippets without requiring a developer to
update code.
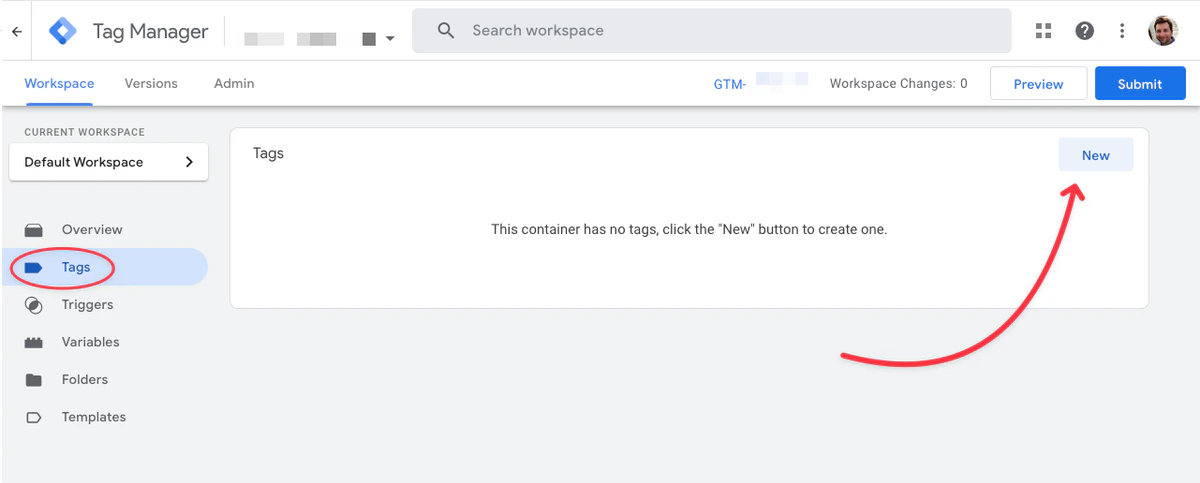
### Step 1: Navigate to the “Tags” section of your GTM account, and click “New” to create a new tag:
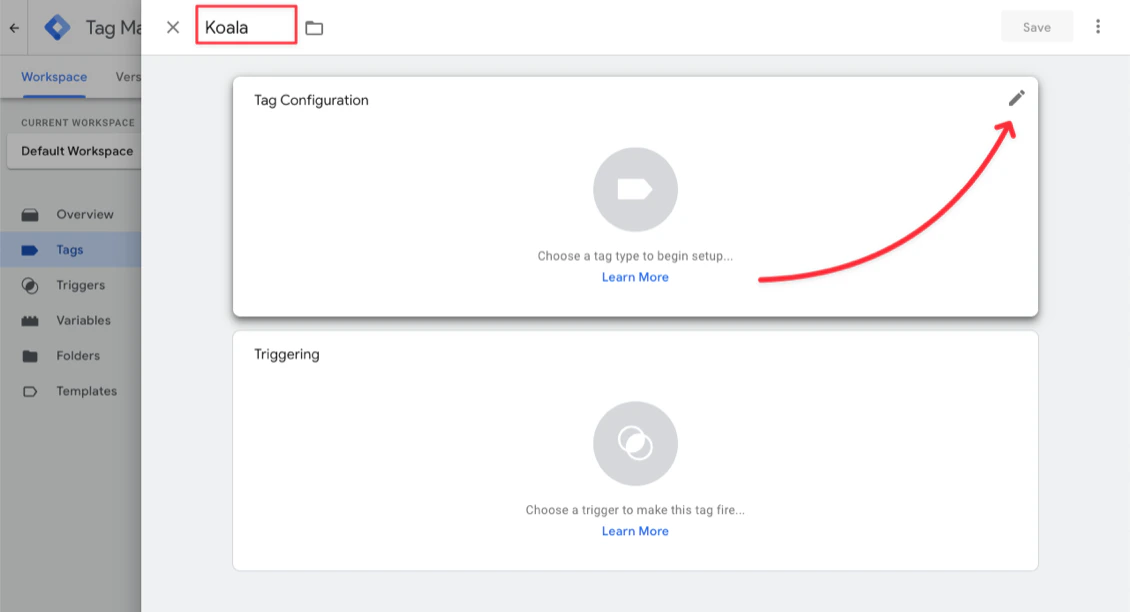
 ### Step 2: Give your tag a name, like “Koala”, then edit the Tag configuration:
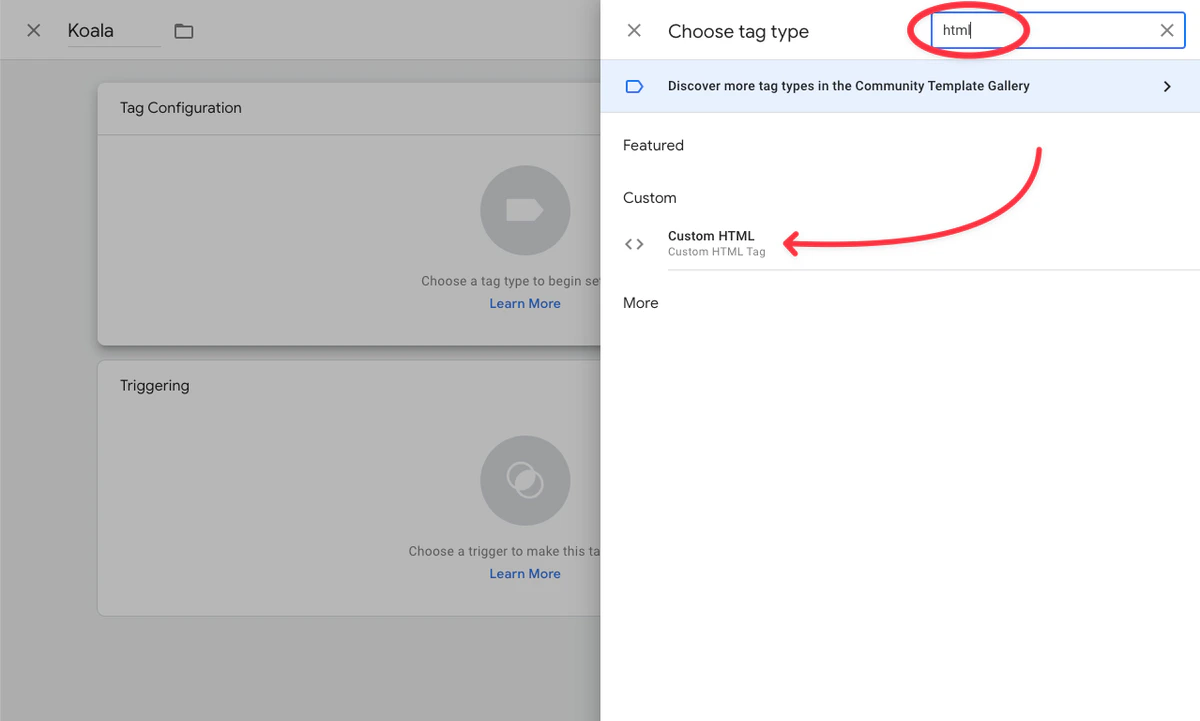
 Next, search for “HTML” and select “Custom HTML” as the tag type:
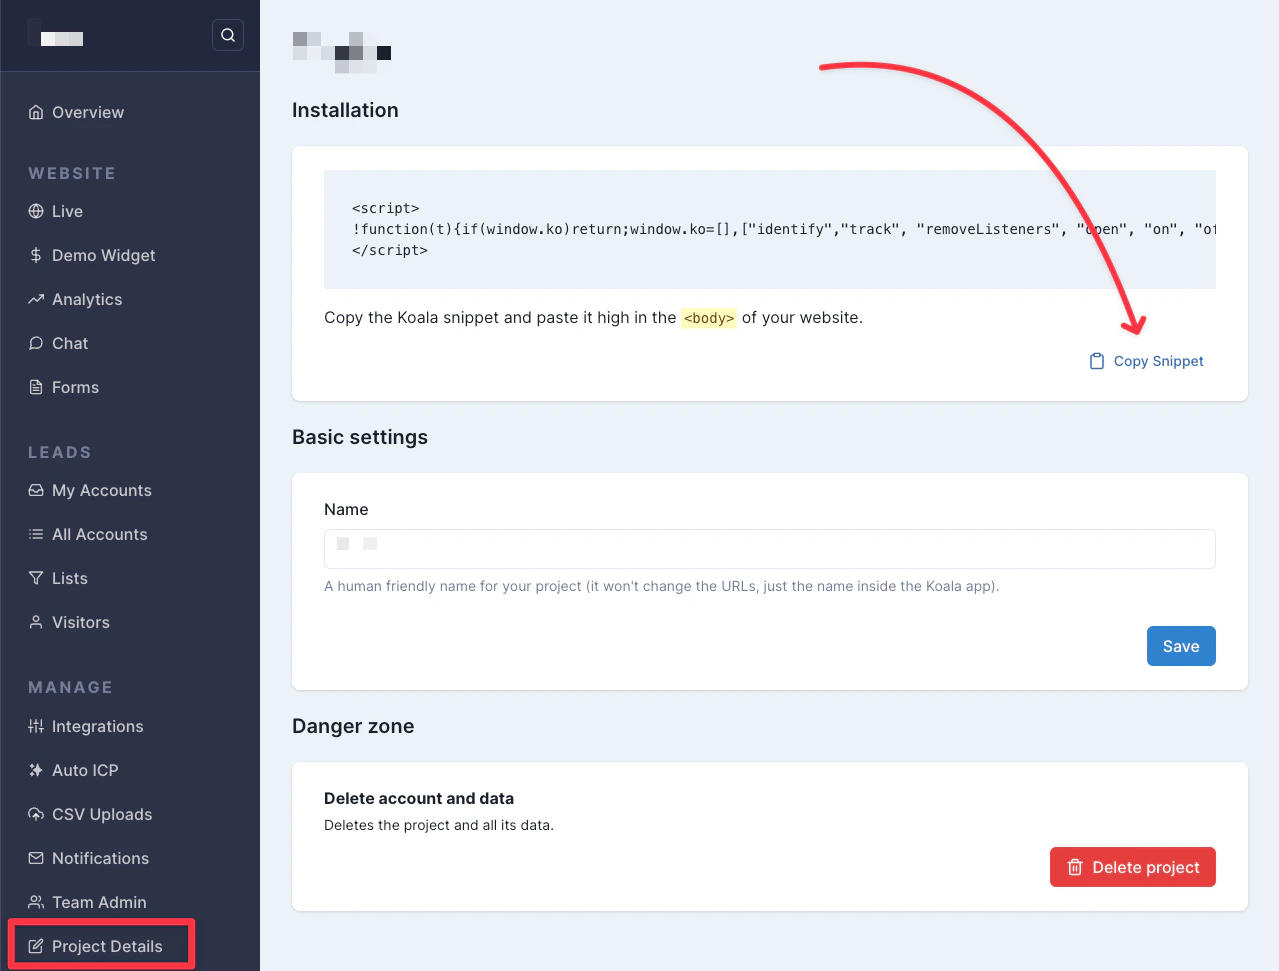
 ### Step 4: Click in the “HTML” text box and paste the script tag from your project settings in Koala:
You can read instructions on where to find your project's snippet in the quick
start guide.
### Step 4: Click in the “HTML” text box and paste the script tag from your project settings in Koala:
You can read instructions on where to find your project's snippet in the quick
start guide.
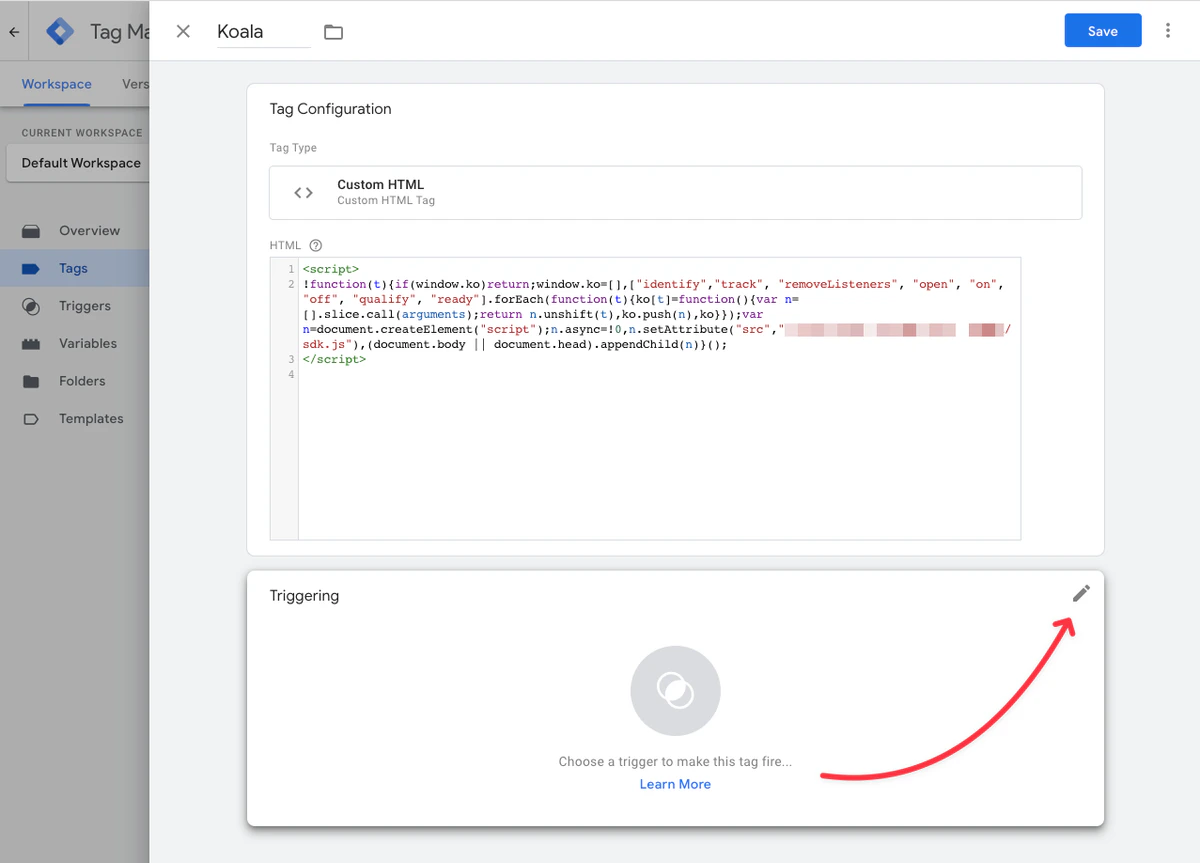
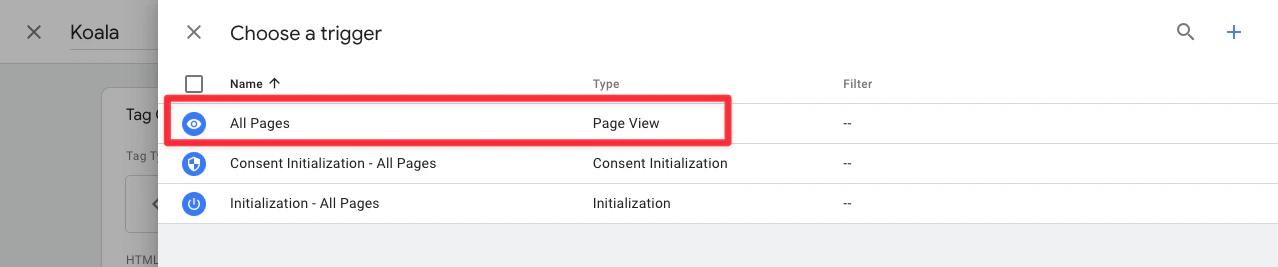
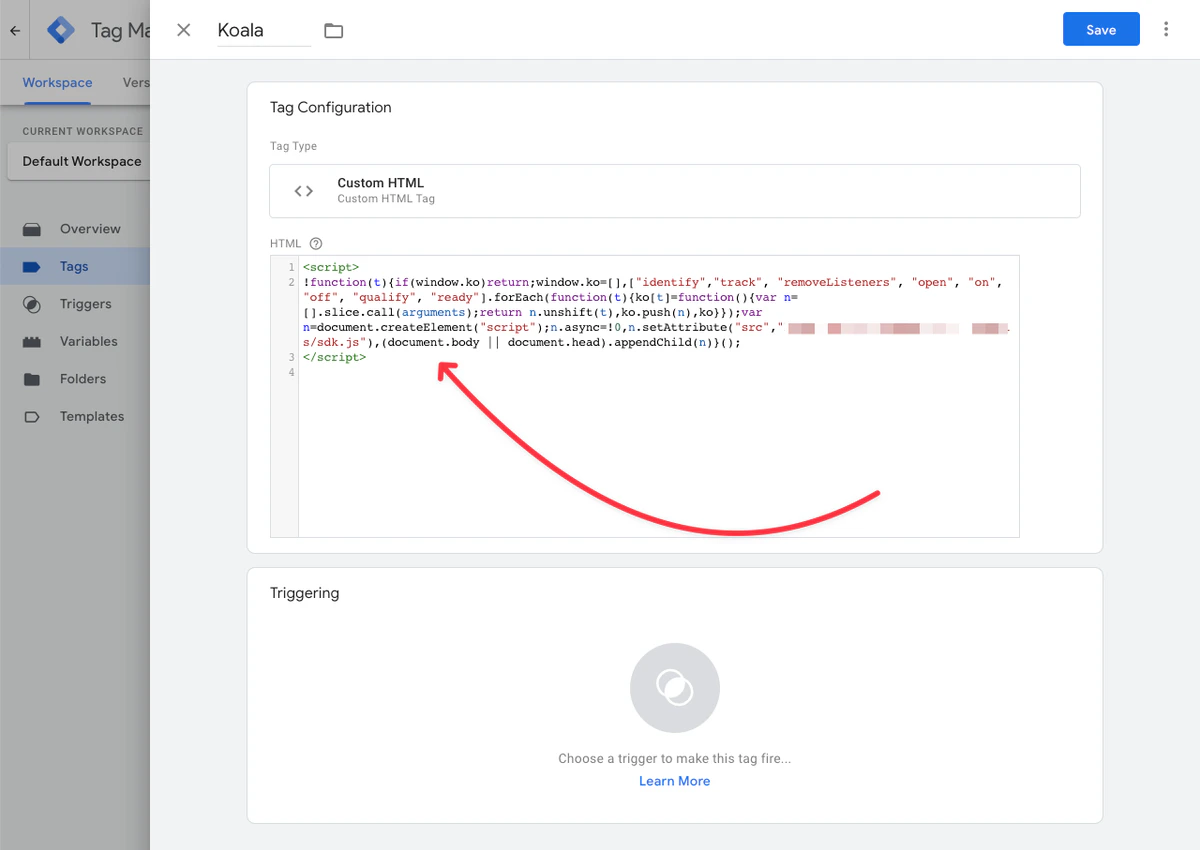 ### Step 5: Now add a trigger for “All Pages: Page View”:
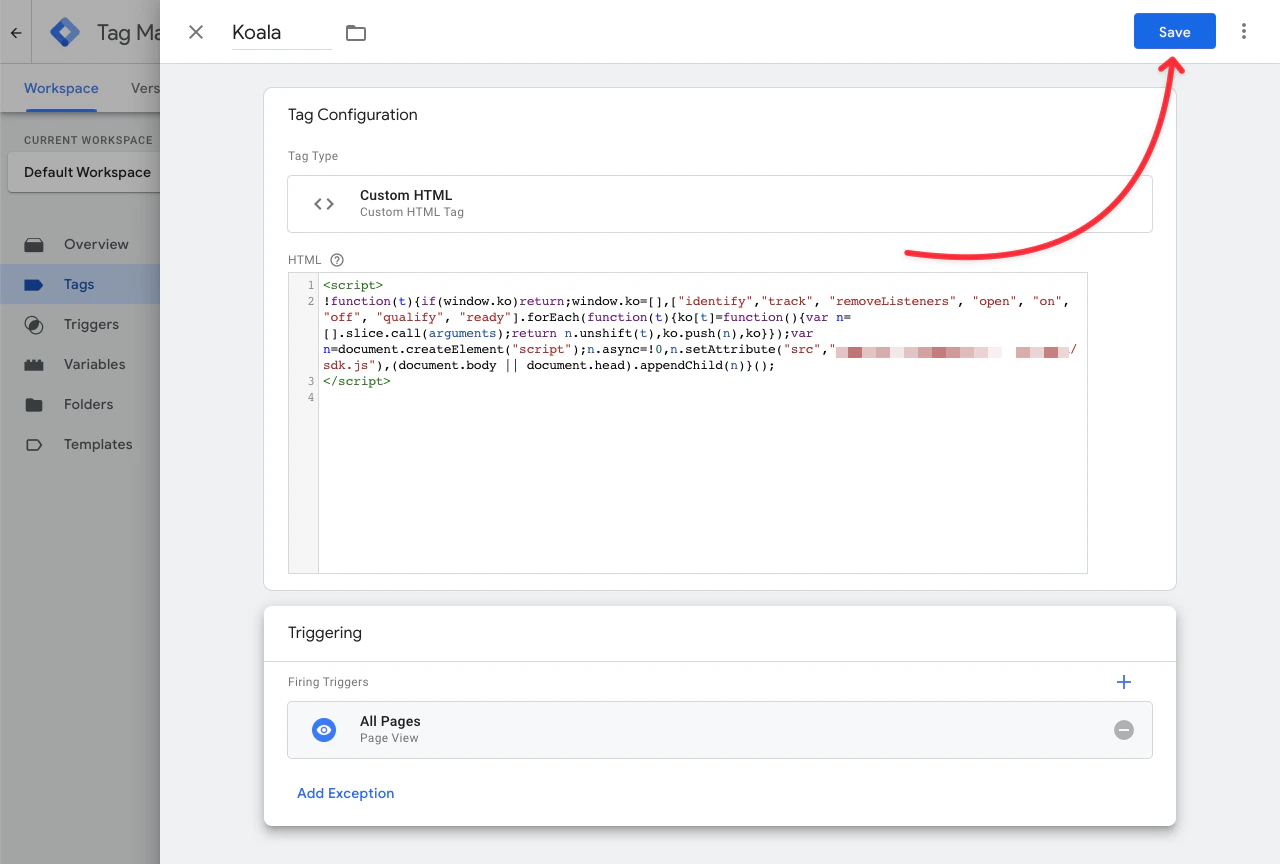
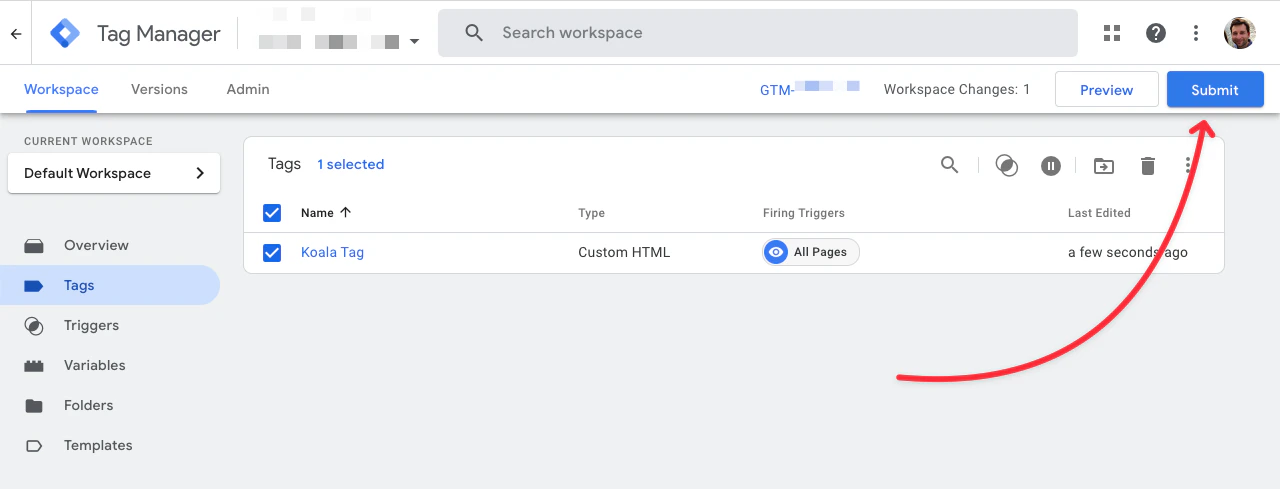
 ### Step 6: Next, click “Save” and Publish your changes:
 ### Step 7: Identify Users (Optional, but recommended!)
Now you can [identify users](/docs/sdk/identify).
### Step 7: Identify Users (Optional, but recommended!)
Now you can [identify users](/docs/sdk/identify).