Okta SAML SSO
To configure Okta SAML SSO, you must:- Be in Admin mode in Okta.
- Have admin permissions in Koala and be on the Business plan.
- Visit the Security settings of your Koala workspace, and switch on the SAML SSO toggle.
- Go back to Okta and create a custom SAML application in Okta.
- In the SAML Settings form copy the
Single-sign on URLandAudience URI (SP Entity ID)from Koala to the Okta form.
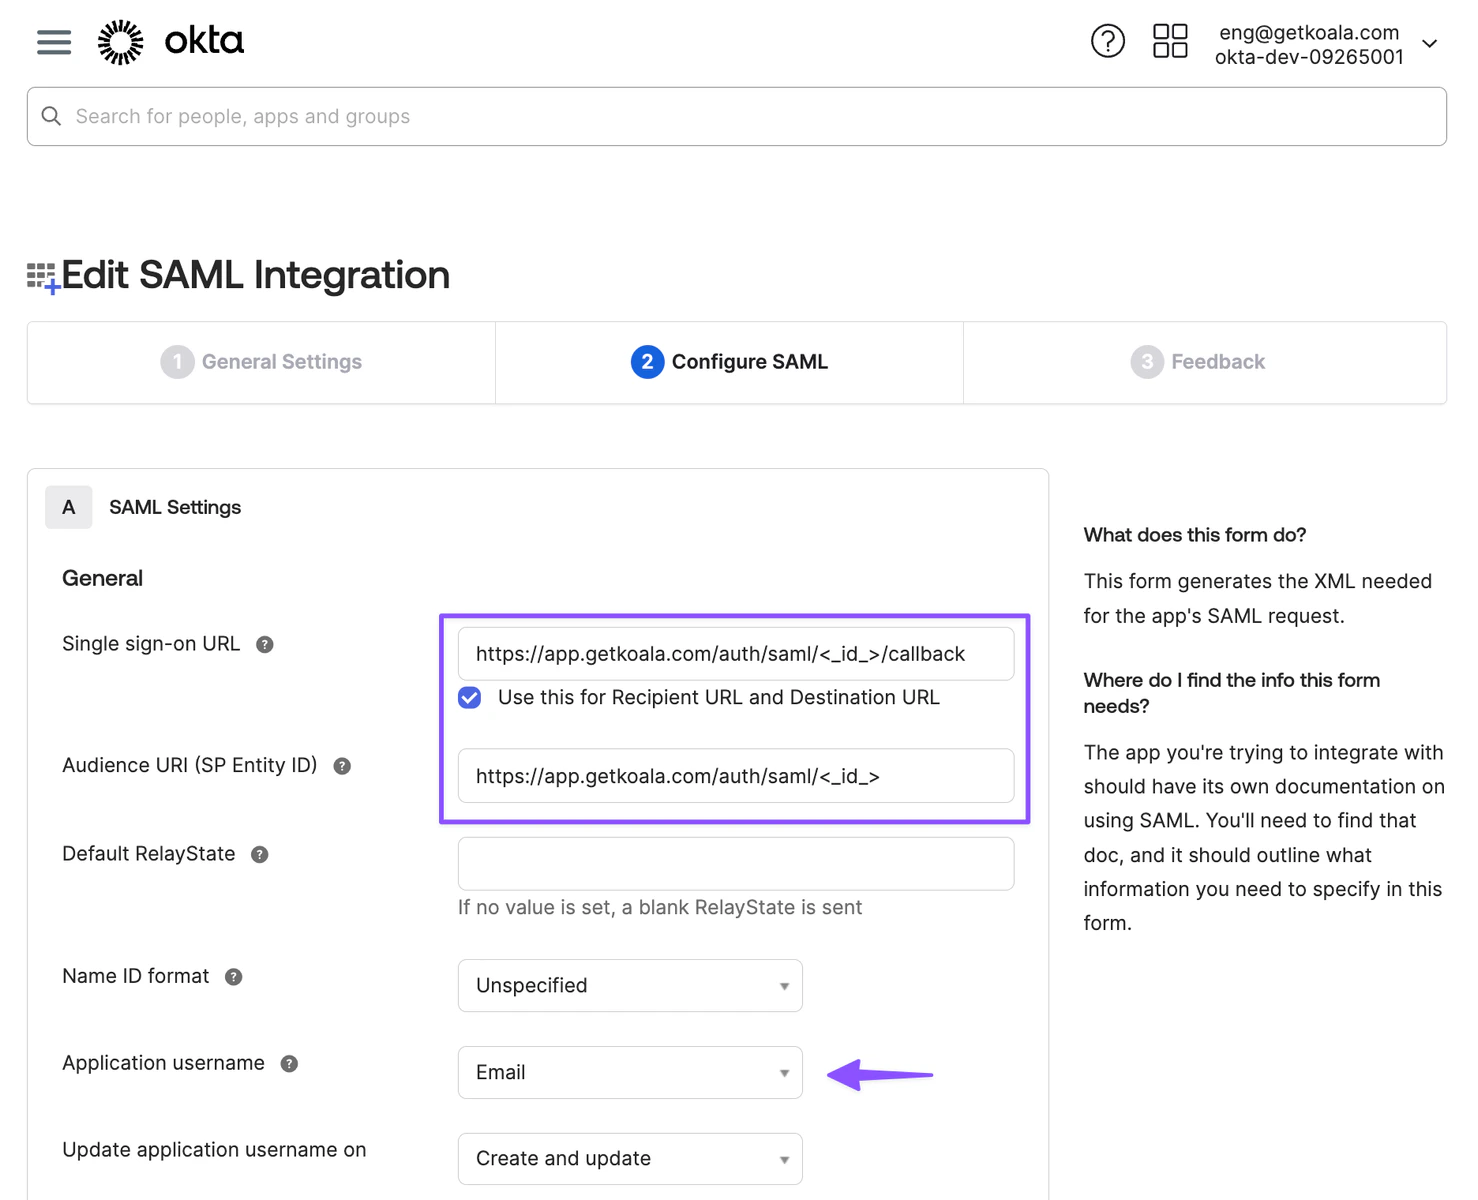
- For the attribute mappings we don’t require any specific attributes, but the Application Username should be set to
Email. - Click continue until the App in Okta is created.
- Assign the app to the users or groups that should have access to Koala.
- Now with the app in Okta created, go to the “Sign On” tab and click on “More Details” link to get the
Single Sign-On URLandCertificate.
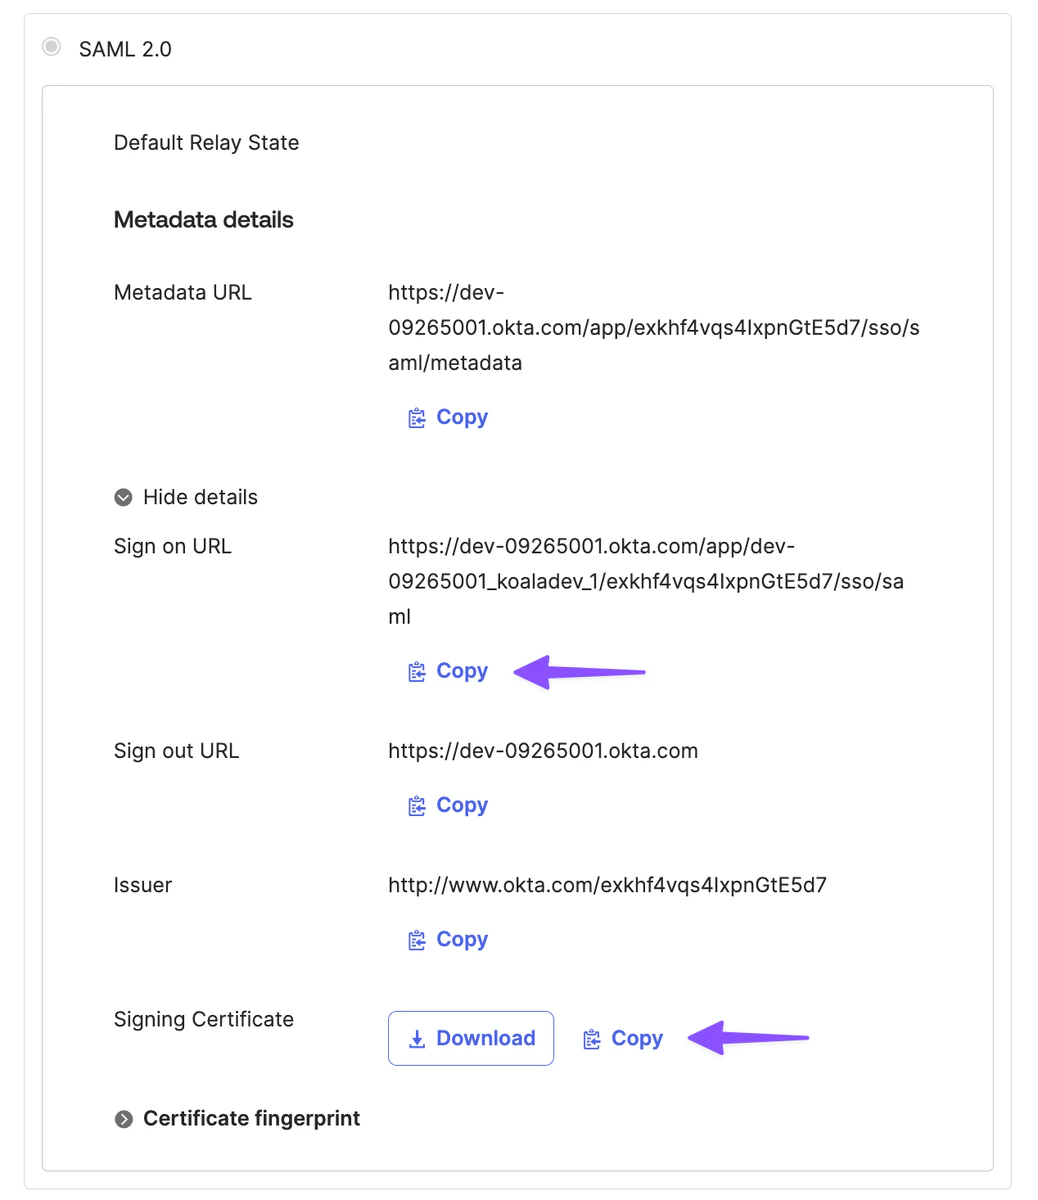
- Go back to Koala and paste the Identity Provider
Single Sign-On URLand theX.509 Certificatein the SAML SSO settings. - Click on Save and you are done.
After saving the SAML SSO settings, you will be logged out and will need to log back in. You have to type in your email address to initiate the SAML SSO flow.
Notes
Okta Group Assignments
When assigning Groups to the Okta App used on Koala’s integration, make sure that the users assigned from that group are shown as “Group” type instead of “Individual”. This inconsistent scenario could happen if a user that belongs to the group was previously assigned as an “individual”, making the login process fail.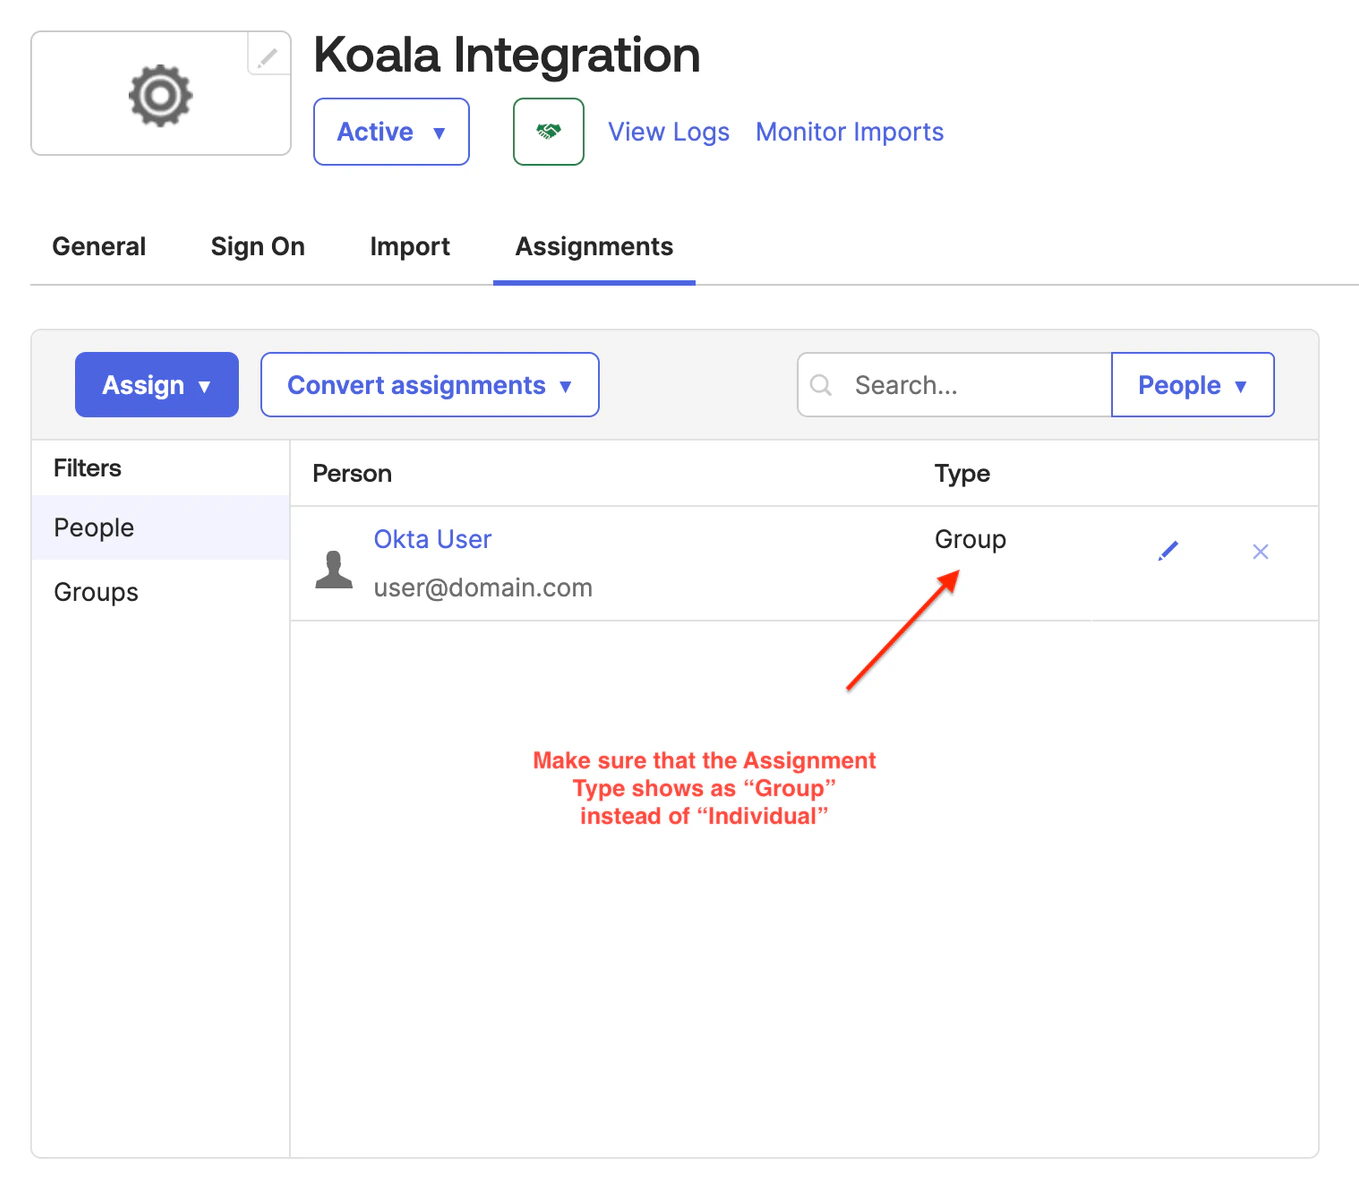
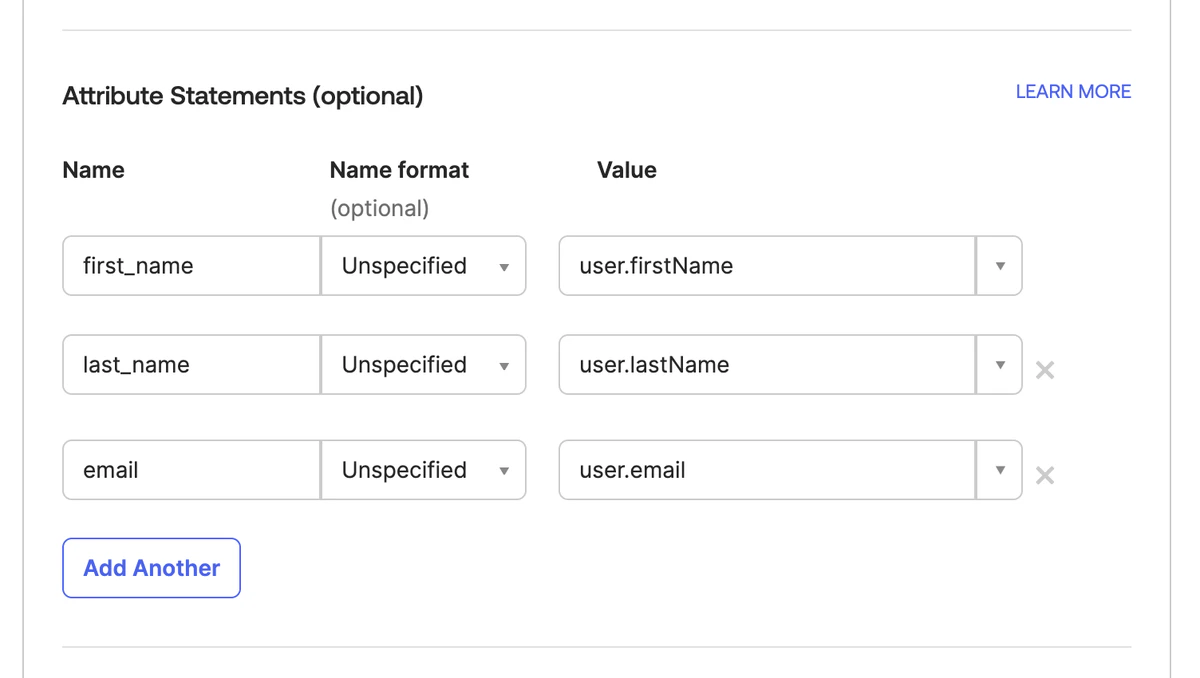
Okta Attribute Statements
To correctly create and activate new users on Koala using Okta’s info, you should configure the Attribute Statements on the Okta App used on integration following these steps:- Click on the App settings and go to the “General” tab;
- Click on the Edit button on the SAML Settings section;
- Click on Next button to go to 2. Configure SAML step;
- Locate the Attribute Statement section and add the following fields:
first_namemapped touser.firstNamelast_namemapped touser.lastNameemailmapped touser.email
- Click on the Next button and then on Finish to confirm the changes.